

Anti color fringing to eliminate the residual chromatic noise
Categories: Light room — Tags: Acutanza, Artefatti, Color fringing, Granulosità, Rumore, Sharpen
Translations:
 italiano •
Talking with Claudio Muzzetto about the article Local techniques of sharpening and noise reduction, we noticed the possibility of another passage that completely eliminates every kind of chromatic noise. The technique is used to reduce the color fringing, (colored halos between lights and shadows, generally due to chromatic aberrations), but can be successfully used to filter the chromatic noise. Once again, I suggest to download the images and observe them 100% zoom to notice the real effects obtained with the described technique.
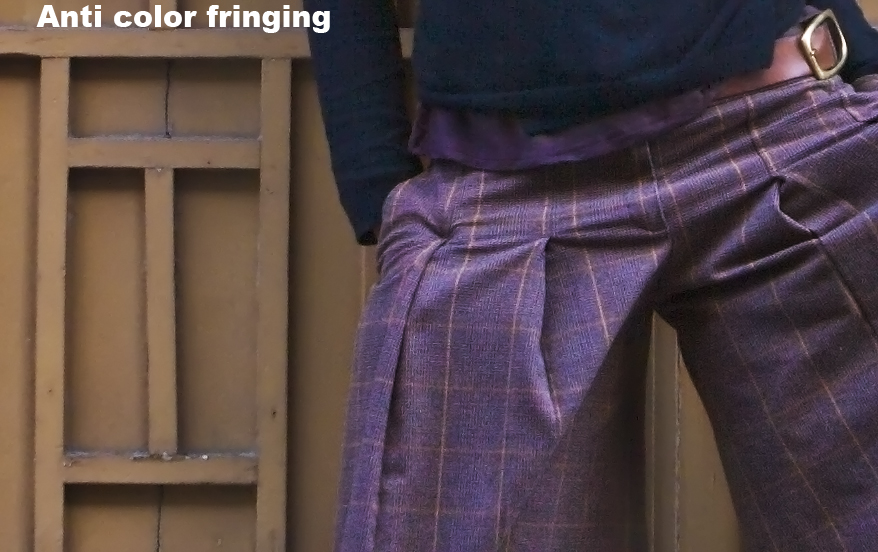
Once arrived to the two-layers configuration described in the article quoted above, you would notice that some chromatic noise is still present inside the horizontal lines of the background, inside the girl’s pants and t-shirt. For the background, Noise Ninja correctly recognizes the edges, and to avoid a loss in details the plug-in doesn’t apply the filter in such zones. In the case of the t-shirt, the noise is probably recognized as detail; therefore once again Noise Ninja doesn’t filter the image in this point, leaving exactly some residual chromatic noise.
To avoid this problem, let’s move in this direction. Duplicate the Noise layer, which is the layer where noise has already been filtered with Noise Ninja. Name the layer as Anti color fringing and eliminate the level mask. Apply a slight Gaussian filter to the layer; usually an out-of-focus-ray between 2 and 4 pixels is enough. The image will be out-of-focus, but if you modify the blending option of this layer from normal to color, the residual chromatic noise will completely disappear and the image will be back in focus, thanks to the Sharpen Layer over the Anti Color Fringing Layer.
The bigger the ray of the Gaussian Blur Filter the more the noise is canceled. At the same time though, if the image is plenty of zones where the color change from one to another, the saturation along those borders will decrease unpleasantly. As usual, we’re describing a compromise. In any case, it is possible to add a mask to avoid the application of this layer on some zones of the image. At this point you can head on as described in the quoted article, modifying the masks by hand, adding some monochromatic uniform noise, etc. The advantage is that no residual chromatic color will be yet present in the pic.
It is possible to automate all of these passages downloading the action set Noise and Sharpen.

Camera Obscura » Tecniche locali di sharpening e riduzione del rumore
said, February 1, 2008 @ 9:17 PM :
[...] Camera Obscura » Anti color fringing per eliminare il rumore cromatico residuo [...]
Camera Obscura » Action photoshop riduzione rumore e sharpening multi layer
said, February 3, 2008 @ 12:29 PM :
[...] dello sharpening descritte negli articoli Tecniche locali di sharpening e riduzione del rumore, Anti color fringing per eliminare il rumore cromatico residuo e Aggiungere il rumore per eliminare il rumore, di cui si raccomanda la lettura prima [...]