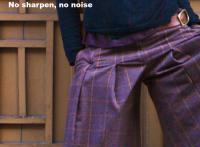
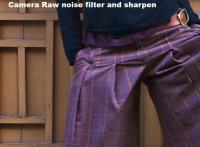
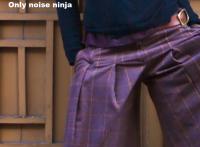
Local sharpening techniques and noise reduction

Concerning analogical photography, once fixed the negative enlarger factor, the detail of a print is principally determined by a good shooting technique (absence of micro blur, correct focusing, correct depth of field and so on) and the resolving power of the shooting objective and the one on the enlarger. The image grain is determined by the film choice, exposition and development. Moreover the development allows controlling the acutance of the image. Furthermore, during the print phase, it is possible to modify both the detail and the picture grain, for example using contrast masks or out-of-focusing some zones with pantyhose interposed between the objective and the enlarger plan, but the interventions are long, laborious, hard to perform and have a somehow limited impact on the acutance and the image grain.
In the case of digital photography, shooting technique, objectives quality and exposition choice strongly influence the details and grain (or better: noise, as analogical grain and digital noise, even if similar, have different origin and characteristics). Anyway, the photographer now has two powerful instruments: sharpen filters and noise reduction filters.
Unfortunately those instruments are often hidden to photographer or they are used mechanically and roughly. The consequence is that many old analogical photographers complain the noise and the absence of sharpness in digital images, thinking that it’s a defect inside the shooting system. Actually, this is largely due to the incorrect use of sharpen and anti-noise filters. The correct application of those instruments could bring to result similar to the ones the analogical photographers are used to or even better ones.
The article (in Italian) The sharpening, of whom I strongly suggest the reading, written by Andrea Olivotto, makes wonderful explanation of the digital techniques to control the acutance. It is a complete article, both for the introductive definition and for the advanced techniques, with tons of links to different articles, plug-ins and on-line resources. Russell Brown’s amazing website has a couple of video tutorials about sharpening, as well as on masks, that are intensely used in this article.
Talking about noise reduction, Noise Reduction Tool Comparison makes a complete confrontation of different software. Unfortunately, as software change (and ameliorate) frequently and quickly, the article is a little bit out of date, it would be better to take it as a list of possible software, software to be tested to find the one that better satisfy our needs. I once wrote an article on Camera Obscura about noise reduction as well: Add noise to eliminate noise.
Sharpen and noise reduction workflow
Talking about my own workflow, first of all I put the sharpen and noise filter of Camera Raw to zero. Then I almost exclusively use the Smart Sharpen of Photoshop (go and see the finest Russel Brown’s tutorial at Smart Sharpen revealed) to manage the detail and Noise Ninja to reduce the noise. I use those filters because I know them well and the result completely fulfill me, but I’m not stating that this is the best combination. Anyway, the ideas exposed in the article – sharpening, noise reduction and the local application of the filters – can be well exploited no matter what kind of algorithm you will use to augment the acutance or reduce the noise of the image.
As any digital technique, there’s no manna from heaven that solves all of the problems automatically, otherwise it would be part of the firmware inside the digital camera. The most excellent results are obtained adapting the use of the instruments to the type of image on which you’re working and the type of result you’d like to achieve.
Depending on the case, I only use Smart Sharpen or Noise Ninja, possibly selecting the zones on the image where I can apply those filters. For example, I strongly apply Noise Ninja on skies, obtaining clear blues, even when the clouds contrast is augmented for retouch interventions. I apply only Smart Sharpen for detailed zones, such as gardens and hair.


Camera Obscura » Anti color fringing per eliminare il rumore cromatico residuo
said, February 1, 2008 @ 9:11 PM :
[...] con Claudio Muzzetto dell’articolo Tecniche locali di sharpening e riduzione del rumore è venuto fuori un passaggio aggiuntivo che permette di eliminare completamente ogni residuo di [...]
Camera Obscura » Action photoshop riduzione rumore e sharpening multi layer
said, February 3, 2008 @ 12:20 PM :
[...] le tecniche di riduzione del rumore e applicazione dello sharpening descritte negli articoli Tecniche locali di sharpening e riduzione del rumore, Anti color fringing per eliminare il rumore cromatico residuo e Aggiungere il rumore per eliminare [...]
Camera Obscura » L’ingrandimento digitale
said, November 26, 2008 @ 10:45 AM :
[...] Tecniche locali di sharpening e riduzione del rumore; [...]