3D Anaglyph Images, by Max Potega
Following text and photographs by Max Potega.
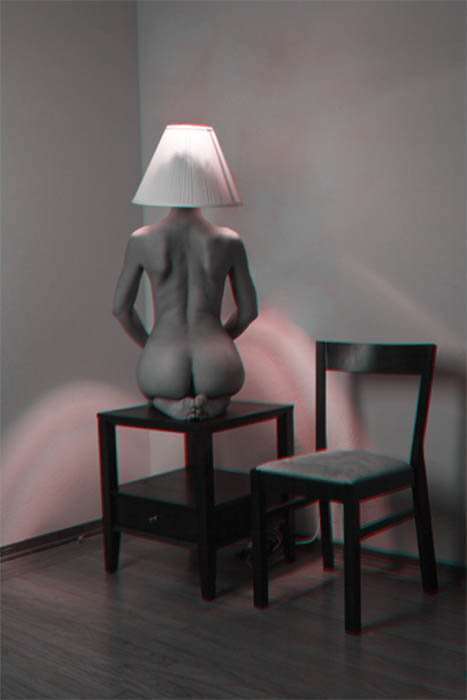
NOTE: To properly view the 3d images 3d glasses (cyan left / red right) are required.
My latest project is finally finished. The Devil’s In the Pixels: The Almost Touchable Naughtiness of MAX Potega is published. The book is a collection of 3D anaglyph images. It was a long arduous road. Model wrangling, location scouting, and book production, all difficult tasks, are all part of the fun.
Anaglyph stereoscopic photography has been around since the 1850s. I jumped on the bandwagon in the early 1990s, but did not start working in earnest with the medium until 2005. Detractors would say 3D is just a gimmick to help sell poorly executed photographs. I agree that some would definitely use it that way; a poor photograph will remain a poor photograph no matter how many effects are applied. However, if dimension is added to an already solid work, the art transforms into something even more stunning.
I have answered many questions at exhibitions for my book. The most common questions are what is it, how is it done, and why. The what and the how are quite simple. The why however, forces one to examine oneself and who likes to do that?
The what:
What is an anaglyph image? The basic theory behind the anaglyph image is that two slightly different images are combined to cause a 3D effect. One image is for the left eye, the other is for the right. The two views of the same subject are colored red and cyan. Although there are several different color combinations, red and cyan appear to be the most commonly used. Wearing special red and cyan glasses cause the brain to see each slightly different image separately. The brain perceives the differences as depth.
The How:
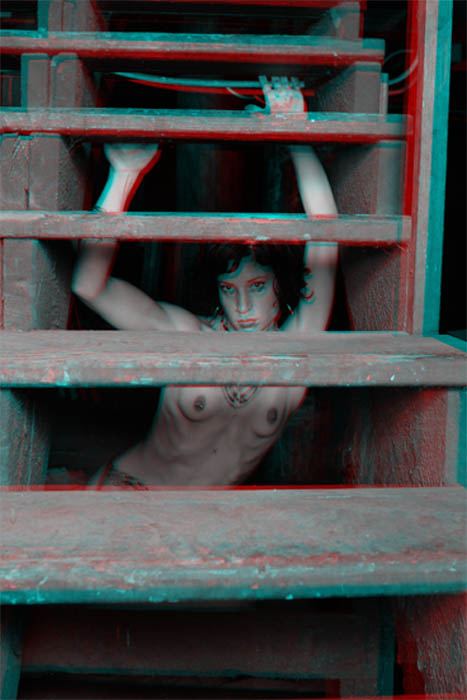
The first thing needed to create an anaglyph is a good subject. Although almost any subject will work, to get the best 3D effect a subject that contains overlapping components is suggested. As my subject matter is generally fetish models, I would arrange images with overlapping legs, arms, and other appropriate props. Overlapping has the strongest effect, but arranging focused elements in the background and in the foreground well also yield decent results.
Once the image is planned, a method of capturing the two slightly different angles of the image must be chosen. There are many different tools and methods to accomplish this. Fuji has just released a digital 3D camera and Loreo produced a 3D lens for Canon cameras. Without special equipment two identical cameras could be placed side by side, or one camera moved slightly for each shot would work.
I took all of the anaglyph images for this article and my book using a single Canon 20D, a tripod, and lots of patience. When using a single camera to collect the images the subject must to remain perfectly still. It is very difficult to keep the sensor in the same plane. To assist with this, use a tripod and mark the floor with tape along the intended path. The camera only needs to move two or three inches for the effect to work. Take one image, quickly drag the tripod along the tape and quickly capture the second image. Repeat this several times, just in case the model moved slightly.
The final step is to blend the images with a photo editing software. Photoshop is my tool of choice. As with anything in Photoshop there are many paths to the same destination. Here is the simple method I used.

Open the two images in Photoshop. Be sure the color space is RBG or sRBG. Perform all the necessary retouching before beginning the anaglyph process. The process makes images a little dark so brighten the image. The amount varies so experimentation is necessary. If the work is intended for print, increase the brightness even more. The audience will essentially be wearing sunglasses to view it.
Select the photo that has the subject closest to the left of the frame. Desaturate the image. Open levels. Select the red channel and change the output level value to zero. This is the cyan layer. Select the right image. Desaturate the image. Open levels. Select the blue channel and change the output level value to zero. Select the green channel and change the output level value to zero. Copy the cyan image and paste it as a layer on top of the red image. With the cyan layer selected reduce the opacity until you can see the red image beneath (about fifty or sixty percent). Align the two layers. Reset the cyan layer opacity to one hundred percent. With the cyan layer still selected change the layer blending method from normal to screen. Congratulations you have just made your first anaglyph. To properly view this image you will need 3D glasses with red left and cyan right.
Anaglyphs can be made in color by skipping the desaturate steps from the instructions above, but the anaglyph process skews the color, and any red or cyan items in the image adversely affect the 3D effect. A black and white anaglyph is cleaner. You may want to experiment with color images as I am partial to black and white “standard” photography as well.
The Why:
The why is the most difficult question. All the images for the book and this article were planned as 3d images. The driving force of their creation was to make an image that exhibits the most 3d quality without compromising photographic artistry. I produced the collection as a book because I felt that a collector would not hang an image that required wearing special glasses to view. The images were made for my own creative desire. The book format was strictly for marketing considerations.
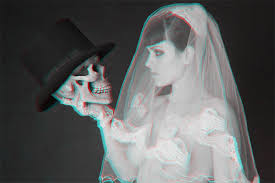
My choice of subject matter was because of my love of the female form coupled with my and admiration of Helmut Newton, as well as my attraction to images that are edgy and a little dark. I am drawn to the beauty that is subtly, and in some case not so subtly, juxtaposed with something a “little off” – be it a prop, pose, or location. I provide a sketch, an opening sentence, and let the viewer fill in the details and meaning.
I hope this provides some insight to anaglyphs and to my work. Please check out the rest of my work for this project and please feel free to contact me with any questions.


