Add noise to remove noise

Even if digital pictures noise is often related to analogical films grain, it is generally aesthetically less pleasant than the second one and it is better do everything possible not to have noise. Apart from useful hints while taking pictures, there are many great post-production systems to filter noise keeping the best of the detail, such as Noise Ninja, also available as a Photoshop plug-in.
Noise Ninja works for the majority of situations; it cleans images from its uniform noise zones, such as skies, leaving the detailed parts of the image almost untouched. Moreover, if it is applied with a border mask, such as the one produced by the script TLR Sharpening Toolkit, and a little of manual work to ameliorate the protection mask, the results are excellent.
There are cases where results are not so good as exposed in the introduction. In fact, if the image has been shot with little light and it should have shadows opened and contrast augmented in photo editing, even with a 16-bit raw file, noise is too strong in the image, which is plenty of unaesthetic artifacts or, in jargon, the file crushes.

The application of a filter to remove the noise ameliorates only in a measure the situation. Applied in a weak way, it can’t eliminate the artifacts amplified by the photo editing. Applied in a strong way, it eliminates the noise but the stains of artifacts remain. The big problem is mostly that the picture looks plastic and fake. This smooth and unreal aspect unfortunately is more and more often visible on the Net and also in some publications of a certain level, symptom of a bad aesthetic taste of the author and of a scarce knowledge of the means of photo editing software.
The solution exists and is very simple. To find it, let’s think that the grain is not unpleasant itself, actually it donates body and matter to the image. I would like to eliminate the defects of the noise, without completely flatten the picture. The digital noise is unpleasant because:
- it augments the chromatic noise: pictures with a strong but monochromatic grain effect are pleasant; pictures full of colored pixels are awful.
- the noise is not uniform: the zones with photo editing have more intense noise, therefore the computer work is more evident.
- the strong application of photo editing not only augment the regular grain of the image, but also makes some other artifacts appears such as banding phenomenon, definitely less aesthetic than the analogical grain or the one simulated digitally.
- noise and grain are not the same; the first one is unpleasant, the second one is generally acceptable.

A file with a uniform and monochromatic noise doesn’t have all those drawbacks. It is sufficient to eliminate the unpleasant noise, smoothing the file and adding a uniform noise to remove a sesation of plastic objects from the edited file. As easy as pie.
To obtain a pleasant result, artifacts must be completely eliminated applying a strong anti-noise filter, without hesitating in using maximum filters values. Not to damage the image, it is better to protect with a mask the zones where details must be maintained and where there’s no artifacts. To remove this kind of plastic effect it is recommended to add a slight monochromatic Gaussian noise (for example less than 1,50%). It is a digital noise, but it is small and uniform, so it will be like grain more than noise. In any case it will be an effect more aesthetic than the original noise amplified by the editing. This way the noise will be constant on the entire image, will recall the monochromatic grain of films and will avoid the unpleasant plastic effect of the anti-noise filters.
It actually eliminates the noise to add a slight simulated grain.
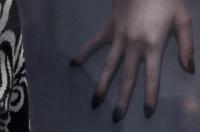
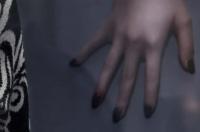
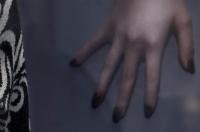
Note: to realize the differences, I suggest to download the three pictures and visualize them at 100%, because if the browser window is too small, the downsized picture creates aliasing effects that avoid what is described in the article.


Camera Obscura » Tecniche locali di sharpening e riduzione del rumore
said, January 13, 2008 @ 11:33 am :
[...] e risorse online. Un articolo sempre sullo sharpening è già apparso anche su Camera Obscura: Aggiungere il rumore per eliminare il rumore. Per quanto riguarda invece la riduzione del rumore, un confronto molto completo di vari software, [...]
Camera Obscura » Simulare una grana intensa e realistica con Photoshop
said, September 11, 2008 @ 7:26 pm :
[...] aggiungere il rumore per eliminare il rumore si spiega in dettaglio come in molte foto scattate ad alta sensibilità, il rumore introdotto dalla [...]
Camera Obscura » L’ingrandimento digitale
said, November 26, 2008 @ 10:44 am :
[...] Aggiungere il rumore per eliminare il rumore; [...]
Tecniche locali di sharpening e riduzione del rumore
said, March 21, 2012 @ 1:11 am :
[...] Per quanto riguarda invece la riduzione del rumore, un confronto molto completo di vari software, è Noise Reduction Tool Comparison. Attualmente purtroppo questo articolo è un po’ antiquato, vista la rapidità con cui cambiano (e migliorano) i programmi di riduzione del rumore nelle fotografie digitali, va preso più come una lista di possibili software, da testare per trovare quello che più soddisfa le proprie esigenze. Un articolo sempre sulla riduzione del rumore è già apparso anche su Camera Obscura: Aggiungere il rumore per eliminare il rumore. [...]