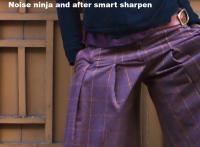
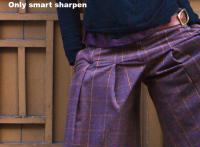
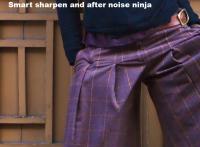
Local sharpening techniques and noise reduction
There are cases in which the manual procedure can be automated or completed by the use of surface and edge masks digitally generated. For this goal, I often use the TLR professional sharpening toolkit plug-in, which allows to obtain splendid results on images with both uniform and detailed zones. The results are particularly respectable, most of all when the masks are defined by hand, so that they completely adapt to the image. All these operations are effectuated on two copy layers of the background, one for sharpness and one for noise, where the masks are applied. This way it is possible to modify the intensity of the effect or the zones where the effect itself is applied.
In addition there are cases where this technique needs to be refined. Some images are particularly hard to work with and the choice of this or that software, the choice of the mask and so on are part of difficult compromises. Images with a strong noise, underexposed or shot on high iso sensibility, which still present highly detailed zones mixed with noise, such as sea surface or dresses, are particularly hard to be processed. In this tutorial I will show a solution that will use all of the quoted instruments and that will give back astonishing results in those complex cases.
Recovering wrong pictures
The image I used in this tutorial is part of a job I made some time ago. I set the camera “manual” to take some pictures of a location to paste in a stitch. Then the model straight a strange pose and I suddenly took a picture, without taking care to the exposure. As I was strongly underexposing the camera, I changed the parameters of the exposure, but the image I finally chose was the stolen image itself.
The only possibility in this case is a good editing effort, to turn the picture into a good work. I adjusted the general exposition with Camera Raw of even an entire stop, opening shadows with Fill Light command. I then managed the local contrast with Photoshop, augmenting it in different zones to entirely regulate the gamut of the picture. These operations obviously brought to a considerable and unacceptable augment of the noise. In this case is exceptionally hard to select the uniform zones to the detailed ones by hand, because an intricate mosaic constitutes the background. There are many lines that must be exalted and at the same time flat areas on which the noise is too evident. It is evidently a hyperbole; the best would be taking the picture again correcting the errors. From the didactic point of view though, this is an amazing opportunity to illustrate the technique we’re working on in this article.
The values of the filters and the used settings
To compare the images, the filters have been applied with the same values. To obtain better result, it would be recommendable to accurately choose the parameters of each filter, but this is only a demonstration.
Noise Ninja, with the profile adequate to the ISO sensibility and the right camera model set, has been used with value 15 for strength and smoothness, both for luminance and color. Those relatively high values have been used to demonstrate the consequences of an aggressive use of the reduction noise filter. The contrast has been kept at 10 and sharpen filter at 0, to use Smart Sharpen only for acutance. Smart Sharpen has been used in its base version for a simpler learning, with 130 of amount and 0.8 of radius, kind of standard values for such dimensioned images. The TLR plug-in has been used to generate surface and edge masks, with High Resolution values for the camera and medium for Sharpen Width.


