Local sharpening techniques and noise reduction
Excellent result anywhere, except in highly detailed zones, such as clothes. Augmenting the sharpen improves the acutance, but increases the noise and loose the fabric weft. Moreover TLR can’t generate a correct surface and edge mask. Noise and detail in this case are intimately related to each other and it is hard to separate them in a way that they can be filtered independently. Any solution will be a less satisfying compromise.
Augmenting the luminance detail filtering the chromatic noise
Thinking about what is the noise, where is evident, which cases are annoying and what you would save of the image would bring to a satisfying solution. The first consideration you should do is that generally the chromatic noise is unpleasant, while the luminance noise, most of all if uniform, is in many cases acceptable. The second consideration is that noise is particularly visible in uniform areas of the image, while where the zone is detailed, even if noise is particularly intense, it always goes unnoticed. It could seem a banal statement, but it is good to underline that the luminance noise in highly detailed zones is rarely irritating.
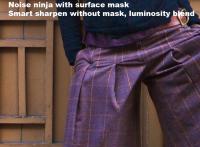
To put in practice those ideas, let’s take the precedent configuration and simply eliminate the edge mask of the sharpen layer (also the noise layer mask could be eliminated, without the edge mask the surface one is completely unuseful), without forgetting that the blend option of the layer must be luminosity. Once again, compared to the firsts examples, the sharpen and noise reduction are applied separately. Both filters are applied to the totality of the image, but individually are applied to a blank copy of the background, therefore they doesn’t negatively interact as seen before.
Proceeding this way you obtain perfect details into clothes. The grain when visible is sharpen and pleasant, the chromatic noise disappeared but in the meantime the fabric weft is kept perfectly, the details of the fabric are set to the right value from the sharpening. Well, obviously the noise background, without the edge mask, augmented even in the flatten areas. Anyway, the grain obtained is defined and monochromatic, so much that the image could be acceptable without any other intervention.
If in some zones of the image a residual chromatic noise is still present, it is possible to eliminate it with a technique inspired to the one that eliminates the color fringing. The details are illustrated into the article Anti color fringing to eliminate the residual chromatic noise.
It is possible to automatize all of these passages downloading the action set Noise&Sharpen.
Local application of detail augment and noise reduction
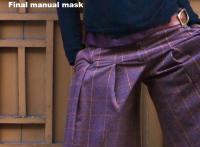
To obtain the best result ever, at this point it is necessary an intervention by hand on masks. For the definitive version of the image, I kept on pants the sharpen layer over the noise layer without any mask. On the shirt I only applied the noise reduction and no sharpen. I then added a slight Gaussian noise, as explained in the article Add noise to eliminate noise.
As far as background is concerned, I applied surface and edge masks automatically generated by TLR with a little of Dust&Scratches filter to smooth down a bit. This is because in noisy images the grain is interpreted from the plug-in as detail. At the same time, I turned the black zones of the edge mask into grey, so that the background has some details more and an insignificant grain, similar to clothes. Those forethoughts are necessary to avoid the plastic effect of the smooth surfaces obtained with aggressive passages of Noise Ninja. At the end of your work, some modification to the layer transparency to harmonize the image. Obviously the image is a pure example. Following your personal taste, clothes can be too sharpened and unnatural, you could dislike the grain on the background, etc. Anyway those are my personal choices, the important point is that you have two layers at your disposal over the background that make you obtain all of the desired effects, only varying opacity and masks.
In the complex, as the majority of the masks are generated automatically and that manual selections can be quickly done with laze and a shade of tenth pixel, the procedure for the local application of sharpen and the noise filter took at last 5 minutes. The results are astonishing if compared to the initial image. Pants are extraordinary detailed, background is smooth as if shot with 100 ISO and correctly exposed, the grain only give substance to the surfaces and is not visible if printed. The results are so convincing that I saved a shot that was completely wrong and I gave the work as the picture simply wasn’t exposed by the book.
Video tutorial
I realized a short video (in Italian) with a practical demonstration of the editing technique described in the article. This way, even the Photoshop beginner can see how to create surface and edge masks, how to generate sharpen and noise reduction layer, how to work with filters and how to modify the masks to modulate the plug-in effects.


